Showing posts with label Leopard. Show all posts

Wednesday, August 26, 2009

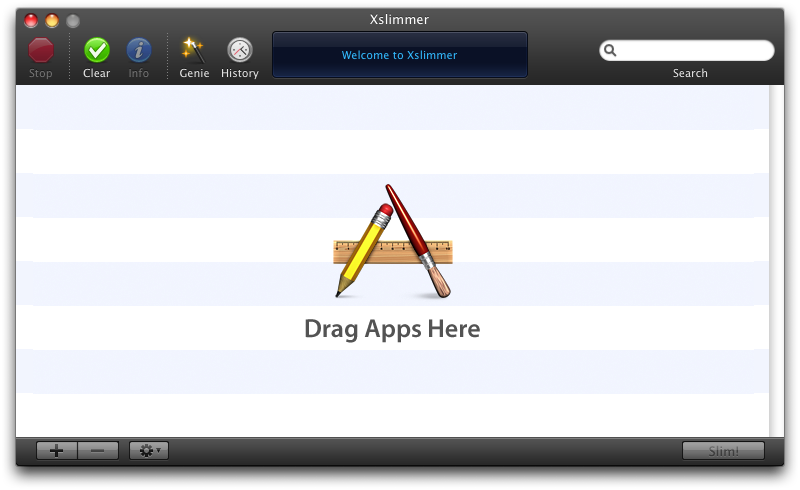
Xslimmer 1.7 now available, fully compatible with Snow Leopard

Xslimmer 1.7 has just been released! It supports 64-bit binaries, honors code signing rules, is able to handle and create native HFS-compressed files and adds many other improvements that will continue to provide a worthwhile and reliable experience to Snow Leopard users (as well as to all others that choose not to upgrade to the latest OS yet). Read on for the gory details!

Universal Binaries are so 2008, aren't they?


Well, unfortunately they are not. Or, should we say, fortunately they are not. Universal Binaries were a key technology that allowed Apple to transition from PowerPC to Intel CPUs in the most awesomely flawless technology adoption ever. The same Universal (or, as they are affectionately called, "fat") Binaries are being put to work again to ensure that Snow Leopard and its apps run flawlessly in all compatible Intel machines, including 32-bit and 64-bit ones.

So instead of packaging binaries in a bundle that contains PowerPC and Intel versions of the code, it will now become usual for developers to provide the 32-bit and the 64-bit versions of the same code. The 64-bit version will be used in 64-bit computers, whereas the 32-bit code will run in CPUs that are not able to handle 64 bits. There is no magic way for the system to transform one into the other, so no matter what computer you have, chances are many of the apps you install will contain code that will be ignored and never will run.

But it gets more interesting! Snow Leopard is truly awesome, but there is no reason for developers not to support Leopard if they can. True, some apps will take advantage of Snow Leopard exclusive technologies such as Grand Central Dispatch, OpenCL or some other new APIs; however, many others won't need these innovations yet and will still support Leopard. But Leopard does run on PowerPC machines, so developers should include a PowerPC version of the code if they want to support the same hardware requirements as the OS. As a result, we are starting to see applications that include not two, but three architectures: Intel 32, Intel 64 and PowerPC. This is the case for some very popular apps such as Tweetie for Mac or the latest version of Apple's own Airport Utility.

Xslimmer was designed to handle these situations, and it has now been tested and optimized for the scenarios above so it will always keep the best version of the code that is available for your Mac. If you own a 64-bit-ready Mac, then Xslimmer will preserve the 64-bit version of your applications' code - when it's available.

Won't Xslimmer break 64-bit applications? What about code-signing?


As discussed above, Xslimmer carefully analyzes your applications and selects the best possible architecture among those available. This is done in a per-application basis, and not following some batch process that blindly keeps a single combination. Analysis includes evaluation of signed resources: code-signing rules are fully honored so that only binaries that can be safely modified will be processed.

Extreme care is applied when slimming, and the operation is performed in the most friendly way. Your slimmed applications are registered again for you in the internal OS databases - your keychain authorizations are preserved, and you don't even need to restart your Mac after slimming it.

But Apple applications are already compressed!


Snow Leopard achieves significant space savings by using transparent file system compression. In fact, all system applications and utilities are installed in a compressed state, although they are transparently uncompressed on the fly without the user ever noticing. Xslimmer 1.7 recognizes and supports this type of compression: if a compressed application is slimmed, then it will be recompressed automatically. Therefore, all system applications in Snow Leopard will still benefit from additional space savings if they are slimmed, without affecting their compression status.

When running on Snow Leopard, Xslimmer will always show you the actual size your applications take up in your disk, and not the uncompressed size as reported by Finder and other tools. This way you can be absolutely sure about the savings you achieve.

We have even taken this technology a step forward. A new option in Xslimmer 1.7 will allow you to compress slimmed binaries that were not originally compressed. This way, your installed third party apps can also benefit from this awesome new HFS+ compression technology in Snow Leopard.

Ok, I'm sold - I'll give it a try!


Wonderful! We've always worked hard to prove that your choice of Xslimmer is really the best option for your slimming needs. In Xslimmer 1.7 you'll find many features designed to slim your Mac easily and with total peace of mind. These include:
Strip out unneeded localizations - As usual, Xslimmer 1.7 will remove translations you don't need, achieving great space savings.

Visual indication of architectures - Another new feature in Xslimmer 1.7, you can now see what architectures an app contains and what the resulting architecture is: Intel 32, Intel 64, PowerPC 32 or PowerPC 64.

Downloadable blacklist - for those apps that check themselves (for anti-piracy reasons, usually) and refuse to start after they have been slimmed. We test every report from other users about malfunctioning apps.

Your personal exclusion list - for folders in your disk that you don't ever want to mess with, for whatever reason.

Integrated backups - designed to let you test your slimmed apps with the confidence that you'll be able to recover them in one click.

Extreme compatibility - Xslimmer 1.7 has been fully optimized for Snow Leopard, but it will still run in Panther, Tiger and Leopard.


So, no matter whether you are a longtime Xslimmer fan or have come across it recently, now is an excellent time to check the combined space savings that Snow Leopard and Xslimmer will bring. We hope you like Xslimmer 1.7!

Saturday, June 21, 2008

WWDC 2008

If I had to summarize this year's WWDC in one word, it would be "Awesome". A year ago, we went to WWDC with no clear goals. We attended a lot of sessions, and met a few people. Overall, it was a good experience, in which we gained a lot of technical knowledge.

This year, it was different. Our primary goal was not to spend all of our time in sessions. We wanted to make our visit business oriented, meeting people, and getting feedback about different aspects of our applications.


After 2 years of working with him, we finally met Louie Mantia, our graphic designer. Currently, he works mostly for our friends at Tapulous, but, fortunately, he still does some work for LateNiteSoft.

DSC01642.JPG


We also met Chuck Soper, Cabel Sasser, Daniel Jalkut, Mike Lee, Kenichi Yoshida, Steve Scott, Tristan O'Tierney, Colin Wheeler, Kevin Hoctor, and some others in the SF Mac Indie Soiree.

During the week, we met with many Apple employees, as well as other entrepreneurs, developers, designers and journalists. We participated in a few labs and different consultancy sessions. We were present at the parties and events, but overall we probably did not make it to more than 5-6 sessions each.

The overall result has been very good, and we are very satisfied. Within the next few weeks we hope to start showing you the outcome of our visit.

Tuesday, April 15, 2008

Dark Xslimmer's Toolbar

A few days back, I watched Cabel Sasser's C4 presentation. I thought it was a very nice presentation, with some insightful bits that can only be produced out of experience. I particularly enjoyed the part where he explains why they had to create their own toolbar. We had to do the same.

During the summer of 2007, Louie Mantia challenged us to produce a black themed version of Xslimmer. As Leopard approached, we were thinking that providing Xslimmer with face lift was a good idea. So, making Xslimmer black would made it look nicely different. At that time, it did sound as something simple: just make the grey areas of the window become black, and the black ink become white. Easy.

I started developing the window part. Fortunately, some people had walked that path before me. Making the window black was relatively easy. Using a background image for the window title + toolbar area was the only tricky part, as, in the beginning, it was not correctly rendered. The top half of the image was drawn in the bottom half of the toolbar, and viceversa. Fortunately, I discovered that setting something called "the pattern phase", within the graphics context, cured the wound. The black window was done.

Next step was to make the toolbar font white. I checked the documentation. Nothing. Checked Cocoa development sites. Nothing. Checked everywhere I could think off. Nothing. Asked other developers. Nada. How could it be? Similarly to the guys in Panic, who were fighting to get access the 3 bottom pixels of NSToolbar, we just wanted to draw white text with a bit of grey shadow, and make the black dotted lines, white dotted lines. That was all. I tried every hack possible, subclasses, all sort of undocumented stuff to try to get access to the text rendering part, so I could invert the colors. Nothing.

My first thought was: "I will just build the toolbar using Interface Builder". Then, I started to design how it would work and operate. I soon realized that it was not going to be an easy task. Not only would I had all sort of issues placing the different pieces of the toolbars, but also controlling them during run time. In addition, Xslimmer already used toolbars in 4 different places, so the code to manage them was already there and would need major rework.

I decided it was time to create our own toolbar management system, a system that would operate in the same fashion as Apple's, but that would provide the needed flexibility. This would allow us to not change the existing toolbar management code, and, at the same time, make the text color any color we wanted. It took a while, but it was fun, and the results paid up:

Xslimmer Dark.png


It was time to get other people's opinion. So, during our beta testing phase, we had a poll. Most of our users did not fully like the dark theme. We held several internal discussions and finally went back to a more "Leopard-like" look, the one that Xslimmer uses today. Given the fact that code for toolbar management was unchanged, rolling back was trivial.

So, at the end, we never used the newly developed toolbar system. At that time, Chris Messina suggested that there might be some interest out there in continuing its development, that we should open source it. To make the toolbar system open source would imply some work: I would have to extract the toolbar and window code, produce a sample application, etc. So, prior to making the effort, I was wondering: Would anyone be really interested?

Tuesday, March 25, 2008

Leopard & Time Machine Experiences


Time Machine Logo

Ever since Time Machine was announced, I had been awaiting for it. I am one of those people that do backup from time to time, but with no regular schedule or automated system. Clearly, Time Machine seemed simple enough and could very well prevent any undesired hiccups.

Once I had Leopard installed on my iMac, I was excited to give Time Machine a try. I decided to buy a Lacie external HD to make the backups. After connecting it, I immediately got a message asking if I wanted to use the disk as a Time Machine disk. I answered positively.

The disk was connected through firewire 800. I left it backing up all night. I took several hours to get all the used space on my iMac HD, a total of 250 Gb, onto the disk. Next day, I launched Time Machine's animated interface. Wonderful. Everything seemed to work fine.

After a some minutes, Time Machine began backing up automatically. This time just a few megabytes. Unfortunately, it took around 15 minutes for something like 3 Mb. In the following days, this became a constant, and I was not happy about it. Backups took way too long. I thought that I had not chosen a good external drive, or that it was faulty.

In addition, my Leopard was not too stable, nor did it operate as fluidly as I was hopping it would. I carefully considered reformatting the iMac with Leopard, and restoring all the user files from Time Machine. I was worried, thought, that the restore process would not work as smoothly as I would want, given the slow backup times and my doubt about the external HD condition.

After some investigation, I found an article that explained how issues might arise for using an APM partitioned drive on an Intel Mac. This could be the cause of my Time Machine troubles. Time for a repartition, reformat, re-first-time-backup.

As my final goal was to get my iMac into better condition, than what the upgrade from Tiger had left it into, I decided that after repartitioning, I would make the external hard drive bootable. I took the Leopard DVD, and using Disk Utility, I "restored" it onto the external hard drive.

Now I had an external hard drive, that used GPT (GUID) instead of the the original APM partitioning, and that was not only bootable, but it had the capacity to install Leopard. Time to try to get all 250 Gb on that disk again. This time it was much faster. It took around 3 hours.

Then, I booted from the external drive. Made a Leopard clean install in around 20 minutes. When the option for transferring files from another Mac was up, I chose to restore from Time Machine. It did it.

Once the restore process finished, most things were fine. As usual, Spotlight started indexing and made the Mac a little bit slow for a while.

After careful examination, I realized that some folders at root level were duplicated. I had "/Applications" and "Applications (from old Mac)". This was true for several others. I deleted all those folders. After all, if I was to need any of those files, they would be present on the Time Machine backup.

Now both Leopard and Time Machine seem to behave reasonable well. I am, though, ready to reproduce this process if I ever need to do so again.

Friday, February 29, 2008

There is Xslimmer in the Air (in the Macbook Air)

Since the Macbook Air was first presented at Macworld '08, we have had several people telling us that we should write about it. In particular, how Xslimmer is an ideal tool for it due to the small hard drive sizes. Faced with this kind of proposal, the question becomes what to exactly point out that it is not totally obvious. Xslimmer is a product to recover disk space from applications. The Macbook Air has a small hard drive. What else? As I do not know, I leave it there and point to you to some other people's articles:

* http://www.isights.org/2008/02/free-disk-space.html

* http://www.macrumors.com/2008/01/31/unboxing-video-of-macbook-air-more-notes/

Enjoy!

Friday, November 02, 2007

Xslimmer 1.2.6 is Out

Featuring support for 64-bit binaries in Leopard, we released a new version of Xslimmer yesterday. Xslimmer will now correctly recognize Universal Binaries that contain 64-bit code. It will keep the 64-bit version of the binary on 64-bit capable machines running Leopard, or the 32-bit version otherwise. In addition, non-Mac architectures are now correctly identified. The release notes are available in our download page.

If you use Time Machine, please exclude the Time Machine backup path in Xslimmer preferences. Even though Xslimmer will not slim Time Machine backup apps, it will analyze them when the Genie is launched, resulting in an overall performance decrease. To avoid this, simply exclude that TM path. A future Xslimmer release will automatically detect and exclude Time Machine folders.

This release is not to be confused with the one for which we are now in betatest period. We just borrowed some of its features, to ensure that Leopard was fully supported.

Enjoy Xslimmer and Leopard!

Saturday, October 27, 2007

Xslimmer and Leopard

We are getting a good number of enquiries about Xslimmer's current version with Leopard. As far as we now, it should work fine: we have tested it out with all developer betas and it did.

Developers did not get the Leopard final build before the general public, so we are now in the process to test it thoroughly with the commercial release to see if there are any new issues we should cope with, although they are not anticipated so far.

On the other hand, apps in Leopard may contain additional architectures with 64-bit versions of the binaries in addition to the usual 32-bit versions. We are now beta testing a new Xslimmer release that is optimized for this situation. Hopefully, it will be released in a few days.

Sunday, July 29, 2007

Lossless same-drive Mac HD Repartition, part 2

A while ago I explained how I did repartition my iMac hard drive. Then came WWDC, and with it I got the Leopard beta. Being in SF, without access to my iMac, I decided that I had to repartition my MacBook hard disk, so I could install Leopard and follow the sessions correctly.

Using my own post, I followed the different instructions. At repartition time, everytime I executed "diskutil resizeVolume ..." I got an error message about not having enough space. My MacBook's HD had been almost full, but I had freed 26Gb in order to make a new 20Gb partition. Clearly, it was not the disk space. It was also clear that my disk was probably highly fragmented and that diskutil was unable to allocate 20 contiguous gigabytes for my new partition.

I found an app called iDefrag. After some tests, I told it to defrag my drive with the default options. I took like 45 minutes to complete the whole process. I then retried the "diskutil resizeVolume ...". This time it worked perfectly.

Friday, June 29, 2007

During and After WWDC

We are back from San Francisco. Wow! What an experience.

We started be finding the Moscone building and getting our badges for next day. Then we went to visit Cupertino. This is me in 1 Infinite Loop:


Next day we saw Steve's keynote and learned about how Mac OS X was evolving. During the next few days we learned about different topics. Everything was very well organized and presentations were generally very good. In addition, the opportunity to talk to the Apple engineers was very interesting.

But not everything was nerdy during those days. We met a lot of people, some of whom we only knew virtually (basically through IM). This is both of us with Brian Ball (MacZOT):


These are Sophie Teutschler (Coversutra), Stuff MC (Pomcast) and Pedro, with John Casasanta in the background:


Juan Alvarez and Mathew (Cha-ching):


Austin Sarner and friends:


Skitch's presentation at the Delicious Generation party:


Apple's party:


And we even had some time for touristing around:


Certainly a nice trip. We hope to repeat it next year!

Monday, June 04, 2007

LateNiteSoft at WWDC '07

I have started WWDC preparation. I have downloaded some of the headstarts, based on the sessions that interest me. Now, I have to install the latest Leopard preview in my laptop. For that, I need to go back to the repartition the hard drive once again. Lucky I did documented the first time!

I believe there are some very interesting technologies in Leopard. Core Animation being one of them. As I have been always interested in Special FX, game development and movie creation, it seems like a natural choice. So, once I get Leopard installed, along with the latest Xcode 3, I will take the material for Core Animation and try to grasp the basics before getting to San Francisco. I do have some ideas of things that would be nice to implement in Xslimmer, and even some ideas about possible new apps that we could create using Core Animation and other Leopard technologies. If I just had a more time...

Anyhow, I hope next week will be a fun one. I am really looking forward to meeting other Mac developers, whatever exciting news Steve Jobs provides us with, and all the possible learnings I can get.

If you are around, and would like to meet, let us know!

Monday, March 12, 2007

Lossless same-drive Mac HD Repartition

Recently I discovered a lossless way to repartition my Mac's main hard drive, without having to boot from an external drive. I have been looking for this for quite a while, as I wanted to install the Mac OS X Leopard preview in order to test the new development tools and maybe try a new feature or two for Xslimmer.


Some people had suggested to use the Bootcamp utility to resize and partition the drive. But I had already installed Windows (basically for gaming) and did not want to lose that partition.

So, I finally read an article on how to do this using the command line command diskutil, and its hidden feature named resizeVolume. If you check the man pages, you will see that there is no information on this matter, but you can obtain some executing "diskutil resizeVolume":

freeport:~ jorge$ diskutil resizeVolume
Disk Utility Tool
Usage: diskutil resizeVolume [Mount Point|Disk Identifier|Device Node] size
...
Non-destructively resize a disk. You may increase or decrease its size.
When decreasing size, you may optionally supply a list of new partitions to create.
Ownership of the affected disk is required.
Valid partition sizes are in the format of .
Valid sizes are B(ytes), K(ilobytes), M(egabytes), G(igabytes), T(erabytes)
Example: 10G (10 gigabytes), 4.23T (4.23 terabytes), 5M (5 megabytes)
resizeVolume is only supported on GPT media with a Journaled HFS+ filesystem.
A size of "limits" will print the range of valid values for the current filesystem.
Example: diskutil resizeVolume disk1s3 10G
JHFS+ HDX1 5G MS-DOS HDX2 5G
Valid filesystems: "Case-sensitive HFS+" "Journaled HFS+" "Case-sensitive Journaled HFS+" "HFS+" "HFS" "MS-DOS FAT32" "MS-DOS FAT16" "MS-DOS" "MS-DOS FAT12" "UFS" "Linux" "Swap"


So, as you can see, to resize a partition you first need to know its name. For that you can use "diskutil list":

freeport:~ jorge$ diskutil list
/dev/disk0
#: type name size identifier
0: GUID_partition_scheme *465.8 GB disk0
1: EFI 200.0 MB disk0s1
2: Apple_HFS Macintosh HD 434.0 GB disk0s2
3: Microsoft Basic Data WINDOWS HD 31.4 GB disk0s3


In my case, the partition was disk0s2. The partition scheme or the EFI partition should be ignored. As I said before, I already had a Mac OS partition and the Bootcamp partition. I wanted to create a new 20 Gb partition out of the main Mac OS partition, disk0s2.

Now, there are some limitations to the resizing. I guess it has to do with how much free space you have in the partition you want to divide. To verify the limitation, you use "diskutil resizeVolume partition_name limits":

freeport:~ jorge$ diskutil resizeVolume disk0s2 limits
For device disk0s2 Macintosh HD:
Current size: 466003951616 bytes
Minimum size: 213448208384 bytes
Maximum size: 466003951616 bytes


Finally, you have to provide the resizing parameters to the "diskutil resizeVolume" command. In my case, I wanted to keep 414Gb for the main partition and create a new Journaled HFS+ with 20Gb:

freeport:~ jorge$ diskutil resizeVolume disk0s2 414G JHFS+ Leopard 20G
Started resizing on disk disk0s2 Macintosh HD
Verifying
Resizing Volume
Adjusting Partitions

Finished resizing on disk disk0s2 Macintosh HD
You will need to manually reformat your new partitions.
WARNING: You must now reboot!


In my case the first step, "Verifying" was what took the longest time. After that it all went very fast.

Once done, you should reboot. After rebooting, you can use diskutil or Disk Utility to prepare that new partition for use.

freeport:~ jorge$ diskutil list
/dev/disk0
#: type name size identifier
0: GUID_partition_scheme *465.8 GB disk0
1: EFI 200.0 MB disk0s1
2: Apple_HFS Macintosh HD 414.0 GB disk0s2
3: Apple_HFS 19.9 GB disk0s3
4: Microsoft Basic Data WINDOWS HD 31.4 GB disk0s4


In my case, I used Disk Utility, selecting the new partition, the Erase tab, then proving a name for the partition, and clicking on the Erase button.

freeport:~ jorge$ diskutil list
/dev/disk0
#: type name size identifier
0: GUID_partition_scheme *465.8 GB disk0
1: EFI 200.0 MB disk0s1
2: Apple_HFS Macintosh HD 414.0 GB disk0s2
3: Apple_HFS Leopard HD 19.9 GB disk0s3
4: Microsoft Basic Data WINDOWS HD 31.4 GB disk0s4

(Update) One more thing needs to be done. This time is for Windows to keep running fine. You should edit boot.ini (I used textmate), so it knows the partition is it located in. Mine looked like this:

[boot loader]
timeout=30
default=multi(0)disk(0)rdisk(0)partition(3)\WINDOWS
[operating systems]
multi(0)disk(0)rdisk(0)partition(3)\WINDOWS="Microsoft Windows XP Professional" /noexecute=optin /fastdetect
As you see, it says partition(3) for the Windows partition, which is now wrong. I changed it to partition(4) and it worked like a charm. Notice partition(3) appears twice, you should change both.

All set!

Now I have Leopard on my Mac along with Tiger and Windows, thanks to these simple operations. Needless to say, before you attempt to do anything like this, you should have a backup.

[Update: I wrote a second part of this article]

Disclaimer: Visitors do assume all the risk of viewing, reading, using, or relying upon this information. We assume no responsibility for damage to computers or software of the visitor or any person the visitor subsequently communicates this information to.

Have fun!