Showing posts with label OS X. Show all posts

Saturday, June 21, 2008

WWDC 2008

If I had to summarize this year's WWDC in one word, it would be "Awesome". A year ago, we went to WWDC with no clear goals. We attended a lot of sessions, and met a few people. Overall, it was a good experience, in which we gained a lot of technical knowledge.

This year, it was different. Our primary goal was not to spend all of our time in sessions. We wanted to make our visit business oriented, meeting people, and getting feedback about different aspects of our applications.


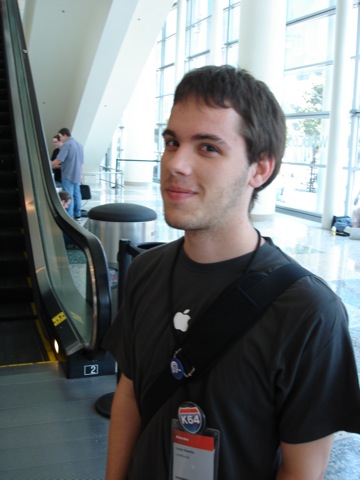
After 2 years of working with him, we finally met Louie Mantia, our graphic designer. Currently, he works mostly for our friends at Tapulous, but, fortunately, he still does some work for LateNiteSoft.

DSC01642.JPG


We also met Chuck Soper, Cabel Sasser, Daniel Jalkut, Mike Lee, Kenichi Yoshida, Steve Scott, Tristan O'Tierney, Colin Wheeler, Kevin Hoctor, and some others in the SF Mac Indie Soiree.

During the week, we met with many Apple employees, as well as other entrepreneurs, developers, designers and journalists. We participated in a few labs and different consultancy sessions. We were present at the parties and events, but overall we probably did not make it to more than 5-6 sessions each.

The overall result has been very good, and we are very satisfied. Within the next few weeks we hope to start showing you the outcome of our visit.

Tuesday, March 25, 2008

Leopard & Time Machine Experiences


Time Machine Logo

Ever since Time Machine was announced, I had been awaiting for it. I am one of those people that do backup from time to time, but with no regular schedule or automated system. Clearly, Time Machine seemed simple enough and could very well prevent any undesired hiccups.

Once I had Leopard installed on my iMac, I was excited to give Time Machine a try. I decided to buy a Lacie external HD to make the backups. After connecting it, I immediately got a message asking if I wanted to use the disk as a Time Machine disk. I answered positively.

The disk was connected through firewire 800. I left it backing up all night. I took several hours to get all the used space on my iMac HD, a total of 250 Gb, onto the disk. Next day, I launched Time Machine's animated interface. Wonderful. Everything seemed to work fine.

After a some minutes, Time Machine began backing up automatically. This time just a few megabytes. Unfortunately, it took around 15 minutes for something like 3 Mb. In the following days, this became a constant, and I was not happy about it. Backups took way too long. I thought that I had not chosen a good external drive, or that it was faulty.

In addition, my Leopard was not too stable, nor did it operate as fluidly as I was hopping it would. I carefully considered reformatting the iMac with Leopard, and restoring all the user files from Time Machine. I was worried, thought, that the restore process would not work as smoothly as I would want, given the slow backup times and my doubt about the external HD condition.

After some investigation, I found an article that explained how issues might arise for using an APM partitioned drive on an Intel Mac. This could be the cause of my Time Machine troubles. Time for a repartition, reformat, re-first-time-backup.

As my final goal was to get my iMac into better condition, than what the upgrade from Tiger had left it into, I decided that after repartitioning, I would make the external hard drive bootable. I took the Leopard DVD, and using Disk Utility, I "restored" it onto the external hard drive.

Now I had an external hard drive, that used GPT (GUID) instead of the the original APM partitioning, and that was not only bootable, but it had the capacity to install Leopard. Time to try to get all 250 Gb on that disk again. This time it was much faster. It took around 3 hours.

Then, I booted from the external drive. Made a Leopard clean install in around 20 minutes. When the option for transferring files from another Mac was up, I chose to restore from Time Machine. It did it.

Once the restore process finished, most things were fine. As usual, Spotlight started indexing and made the Mac a little bit slow for a while.

After careful examination, I realized that some folders at root level were duplicated. I had "/Applications" and "Applications (from old Mac)". This was true for several others. I deleted all those folders. After all, if I was to need any of those files, they would be present on the Time Machine backup.

Now both Leopard and Time Machine seem to behave reasonable well. I am, though, ready to reproduce this process if I ever need to do so again.

Sunday, July 29, 2007

Lossless same-drive Mac HD Repartition, part 2

A while ago I explained how I did repartition my iMac hard drive. Then came WWDC, and with it I got the Leopard beta. Being in SF, without access to my iMac, I decided that I had to repartition my MacBook hard disk, so I could install Leopard and follow the sessions correctly.

Using my own post, I followed the different instructions. At repartition time, everytime I executed "diskutil resizeVolume ..." I got an error message about not having enough space. My MacBook's HD had been almost full, but I had freed 26Gb in order to make a new 20Gb partition. Clearly, it was not the disk space. It was also clear that my disk was probably highly fragmented and that diskutil was unable to allocate 20 contiguous gigabytes for my new partition.

I found an app called iDefrag. After some tests, I told it to defrag my drive with the default options. I took like 45 minutes to complete the whole process. I then retried the "diskutil resizeVolume ...". This time it worked perfectly.

Monday, April 02, 2007

Want to try Xslimmer 1.2.3 Beta ?

Xslimmer 1.2.3 is finished. Quite a few things have changed from the previous version:
  • Column headers, sorting. The application list now features column headers, allowing you to sort the applications by the criteria of your preference
  • Additional application information through drawer. Using the "Info" icon of the toolbar you can get a side drawer that adds information on the application, and offers a couple of actions: exclude and slim.
  • Single application slim. You can use the drawer or the secondary click on an app to slim that app alone.
  • App exclusion is now accessible through toolbar, secondary click menu and drawer
  • Progress bars and several icons design has been updated
  • 3 new localizations have been added: Japanese, Dutch, Swedish (not complete yet)
  • Delete, Backspace keys now eliminate applications from the list
  • History is now resorted after slim has finished, maintaining the selected criteria
  • History and backup purging are no longer active by default

So, we want volunteers to test it for a few days before launching it. Please remember, it is beta software. Should you detect any issues, please contact us!

Xslimmer 1.2.3b2 can be downloaded here.

Friday, March 30, 2007

Xslimmer 1.2.2 crack released! So what?

I've just found out that Xslimmer 1.2.2 has been cracked. It's not too bad, this release has been out for a few weeks already, while previous versions had the dubious honor of having been pirated in only a couple of days. Is this because we have strengthened our protection system? No, it is not. We haven't changed a bit (or a comma) of our code in that respect. Are we planning to do so? No, we are not. We have too little time and too many things to do. We prefer to spend our precious sleepless hours working on new features and customer support rather than fighting some infantile dumbheads.

The situation is very simple. We have made a lot of effort, and people seem to like our software. If they keep buying copies, we can continue improving Xslimmer and working on the other ideas we have. Otherwise, we won't. Each individual sale is worth much more than the 12 bucks we charge for a license. Each sale is a recognition that we have made something useful and valuable, a boost of morale, a reason to keep on working to the expense of our free time and our families. We strive to provide our customers the best service we possibly can. You see, it's not only the money, it's not even the prospect to become full-time indie developers one day: it's our pride and reputation that are at stake.

I believe that this is clear not only for ourselves, but for the vast majority of the "Mac community". As you may know, being recent switchers we are relatively new to the Mac family. One of the most notorious aspects of owning a Mac involves the feeling that you are part of a group of nice, discerning people. You don't buy a Mac for nothing: you buy it because you are looking for something special. Mac owners are warm to newcomers, passionate about quality and highly discerning about the difference between a carefully crafted application and a quick, careless hack. The first Xslimmer crack came out in less than 24 hours after release of version 1.0. And some of our well-known competitors are freeware applications. And still, some people buy copies of Xslimmer. It doesn't mean that our competitors are crap, it means that people will recognize the different approach in each application, and will buy Xslimmer if they believe it suits their needs best. And, of course, most don't consider downloading a crack, because they recognize the work that has to be done to put an application together. I had not seen this passion in the Windows or the Linux worlds, and I am proud to have become a member of this community.

Other authors
have previously explained that most people that use pirated versions of your software will probably never buy it, even if the crack did not exist. Having lived among Mac users for a while, I'm a convert to this theory now. I'm even inclined to measure it. This post is, in fact, a little experiment to test to what extent piracy affects sales. If you are proud to be a Mac owner, feel free to spread the word: there is a cracked version of Xslimmer going around, but also a legitimate one whose purchase is the way to show your support for its development. Do you think our sales will decrease significantly? I'm willing to bet that they won't. But I'll measure the conversion ratio (sales to downloads) during the following days, and will post any meaningful results here, so we'll see.

A final reason not to use pirated copies of Xslimmer, if you need any, is that we are planning to release version 1.2.3 next week. Version 1.2.4 will come a couple of weeks after that. And so on, until we run out of ideas. Do you want to depend on some random drone to enjoy the upgrades? We'll see in a few days what the results of our little experiment are, but I doubt you will.

Monday, March 12, 2007

Lossless same-drive Mac HD Repartition

Recently I discovered a lossless way to repartition my Mac's main hard drive, without having to boot from an external drive. I have been looking for this for quite a while, as I wanted to install the Mac OS X Leopard preview in order to test the new development tools and maybe try a new feature or two for Xslimmer.


Some people had suggested to use the Bootcamp utility to resize and partition the drive. But I had already installed Windows (basically for gaming) and did not want to lose that partition.

So, I finally read an article on how to do this using the command line command diskutil, and its hidden feature named resizeVolume. If you check the man pages, you will see that there is no information on this matter, but you can obtain some executing "diskutil resizeVolume":

freeport:~ jorge$ diskutil resizeVolume
Disk Utility Tool
Usage: diskutil resizeVolume [Mount Point|Disk Identifier|Device Node] size
...
Non-destructively resize a disk. You may increase or decrease its size.
When decreasing size, you may optionally supply a list of new partitions to create.
Ownership of the affected disk is required.
Valid partition sizes are in the format of .
Valid sizes are B(ytes), K(ilobytes), M(egabytes), G(igabytes), T(erabytes)
Example: 10G (10 gigabytes), 4.23T (4.23 terabytes), 5M (5 megabytes)
resizeVolume is only supported on GPT media with a Journaled HFS+ filesystem.
A size of "limits" will print the range of valid values for the current filesystem.
Example: diskutil resizeVolume disk1s3 10G
JHFS+ HDX1 5G MS-DOS HDX2 5G
Valid filesystems: "Case-sensitive HFS+" "Journaled HFS+" "Case-sensitive Journaled HFS+" "HFS+" "HFS" "MS-DOS FAT32" "MS-DOS FAT16" "MS-DOS" "MS-DOS FAT12" "UFS" "Linux" "Swap"


So, as you can see, to resize a partition you first need to know its name. For that you can use "diskutil list":

freeport:~ jorge$ diskutil list
/dev/disk0
#: type name size identifier
0: GUID_partition_scheme *465.8 GB disk0
1: EFI 200.0 MB disk0s1
2: Apple_HFS Macintosh HD 434.0 GB disk0s2
3: Microsoft Basic Data WINDOWS HD 31.4 GB disk0s3


In my case, the partition was disk0s2. The partition scheme or the EFI partition should be ignored. As I said before, I already had a Mac OS partition and the Bootcamp partition. I wanted to create a new 20 Gb partition out of the main Mac OS partition, disk0s2.

Now, there are some limitations to the resizing. I guess it has to do with how much free space you have in the partition you want to divide. To verify the limitation, you use "diskutil resizeVolume partition_name limits":

freeport:~ jorge$ diskutil resizeVolume disk0s2 limits
For device disk0s2 Macintosh HD:
Current size: 466003951616 bytes
Minimum size: 213448208384 bytes
Maximum size: 466003951616 bytes


Finally, you have to provide the resizing parameters to the "diskutil resizeVolume" command. In my case, I wanted to keep 414Gb for the main partition and create a new Journaled HFS+ with 20Gb:

freeport:~ jorge$ diskutil resizeVolume disk0s2 414G JHFS+ Leopard 20G
Started resizing on disk disk0s2 Macintosh HD
Verifying
Resizing Volume
Adjusting Partitions

Finished resizing on disk disk0s2 Macintosh HD
You will need to manually reformat your new partitions.
WARNING: You must now reboot!


In my case the first step, "Verifying" was what took the longest time. After that it all went very fast.

Once done, you should reboot. After rebooting, you can use diskutil or Disk Utility to prepare that new partition for use.

freeport:~ jorge$ diskutil list
/dev/disk0
#: type name size identifier
0: GUID_partition_scheme *465.8 GB disk0
1: EFI 200.0 MB disk0s1
2: Apple_HFS Macintosh HD 414.0 GB disk0s2
3: Apple_HFS 19.9 GB disk0s3
4: Microsoft Basic Data WINDOWS HD 31.4 GB disk0s4


In my case, I used Disk Utility, selecting the new partition, the Erase tab, then proving a name for the partition, and clicking on the Erase button.

freeport:~ jorge$ diskutil list
/dev/disk0
#: type name size identifier
0: GUID_partition_scheme *465.8 GB disk0
1: EFI 200.0 MB disk0s1
2: Apple_HFS Macintosh HD 414.0 GB disk0s2
3: Apple_HFS Leopard HD 19.9 GB disk0s3
4: Microsoft Basic Data WINDOWS HD 31.4 GB disk0s4

(Update) One more thing needs to be done. This time is for Windows to keep running fine. You should edit boot.ini (I used textmate), so it knows the partition is it located in. Mine looked like this:

[boot loader]
timeout=30
default=multi(0)disk(0)rdisk(0)partition(3)\WINDOWS
[operating systems]
multi(0)disk(0)rdisk(0)partition(3)\WINDOWS="Microsoft Windows XP Professional" /noexecute=optin /fastdetect
As you see, it says partition(3) for the Windows partition, which is now wrong. I changed it to partition(4) and it worked like a charm. Notice partition(3) appears twice, you should change both.

All set!

Now I have Leopard on my Mac along with Tiger and Windows, thanks to these simple operations. Needless to say, before you attempt to do anything like this, you should have a backup.

[Update: I wrote a second part of this article]

Disclaimer: Visitors do assume all the risk of viewing, reading, using, or relying upon this information. We assume no responsibility for damage to computers or software of the visitor or any person the visitor subsequently communicates this information to.

Have fun!

Monday, December 25, 2006

Season Greetings

The last 2 months have been very intensive. We launched the first public beta of Xslimmer on November 1st. Since then until now, we have had several different releases, 10 in beta, 6 non-beta. Beta releases were mostly oriented to issue resolution, while non-beta have been dedicated to adding new features to the product. Today, in addition to what was included in the very first version, Xslimmer includes:

* Dock-drop feature
* History log window
* Restore function
* Report function
* Growl support
* Direct Slim feature
* Revamped Preferences
* Improved Window animations and transitions
* Other UI improvements
* Many performance improvements
* Panther compatibility

We continue with our roadmap, which includes quite a good number of additional features, and some major new functionalities, like the ability to strip languages.

This is not all. During this period, we have executed 3 different marketing actions. We started with the GiftZOT bundle (at MacZOT), then a MacAppADay one-day feature and the AppZapper/Xslimmer Christmas bundle.

Hundreds of emails, many hours dedicated to the website, particularly its backend and much, much more. Seeing the results, it clearly has been worth it. Pedro and myself would like to thank you all for the support and feedback you have provided us.

We hope you enjoy a very happy Christmas and a great new year.

Sunday, November 26, 2006

Xslimmer 1.1.2 has been released

After the release of the first non-beta of Xslimmer we have been quite busy. Lots of emails with questions, suggestions, and so on. Now we are back with our implementation roadmap, and today we have released version 1.1.2.

In this new version you will find the dock-drop feature: applications can now be dropped to Xslimmer's dock icon, making it even easier to slim them down. Apps can also be dropped on the application icon. This was requested by several people since the application was made known. In addition, we had still to optimize one heavy-duty loop. This optimization has also made it into this release, along with an optimization into checking applications dropped against the blacklist. Finally, we introduce some changes into de animation between windows that should make them smoother, particularly in PowerPC systems.

And now, to work on 1.1.3. Take care.

Saturday, November 18, 2006

Xslimmer is Out!

That is right! We got there. After 20 days of public beta, we are ready to launch commercially. From this moment, you can buy a license of Xslimmer, and, for a limited time only, is just $6.95.

Thanks go to all people who have helped us during the testing period.

Monday, November 13, 2006

1.0.8.RC2 is out. 1.1 Coming soon!

We have a new version of Xslimmer out. Unless we get any last minute surprises, it will be the last beta version. Next Saturday night, the night of the 18th to the 19th of November, Xslimmer 1.1 will be launched.

This will be the first commercial version of Xslimmer. To support our launch we are planning different marketing actions. First of all, we will have, for a limited time, an special introductory offer. For this period of time, a full license of Xslimmer will cost only $6.95. In addition, we are also planning different limited time offers whose deals are being worked upon with different Mac sites. You probably know who they are. If you want to suggest to us any special action, you are more than welcome.

Getting there, at last!